You’ll set scope, line‑item budget (+15–20% contingency), and timeline aligned with permits and inspections. Verify load‑bearing limits before demo. Plan code‑compliant layouts: 42–48 in aisles, 24–36 in landings, 30 in fixture clearance, ventilation per IMC/ASHRAE 62.2. Audit plumbing and electrical; provide GFCI/AFCI, dedicated appliance circuits, and proper venting. Specify cement backer, ANSI A118.10 membranes, tiles with DCOF≥0.42. Sequence demo, rough‑ins, tests, and closeout. If you want results that pass and perform, next steps unpack it.
Key Takeaways
- Define scope, line-item budget with 15–20% contingency, timeline, and responsibilities before design begins.
- Validate layout for daily use: clearances, aisles, landing spaces, lighting, ventilation, and accessibility.
- Confirm structural limits, pull required permits early, and plan for inspections and potential review delays.
- Audit plumbing, electrical, and ventilation; size loads, assign dedicated circuits, and meet GFCI/AFCI and ASHRAE/IMC codes.
- Specify durable, code-compliant materials and waterproofing, and hire licensed, insured trades with detailed written contracts.
Defining Scope, Budget, and Timeline
Before you draw plans, define the project scope, budget, and timeline with code and permitting in mind. Identify all work categories: structural changes, plumbing reconfiguration, electrical upgrades, mechanical ventilation, waterproofing, cabinetry, finishes, and appliance/fixture swaps. Decide what’s replacement-in-kind versus relocation, since that determines permit level, inspection points, and cost. Consult your authority having jurisdiction for submittal requirements, NEC/IPC/IMC/IRC triggers, and energy or ventilation mandates. Build a line-item budget with quantities, unit costs, permit fees, engineering, testing, disposal, protection, and 15–20% contingency for hidden conditions. Sequence tasks by critical path: demo, rough-ins, inspections, drywall/backer, waterproofing, tile, millwork, tops, set fixtures, final electrical, commissioning, and final inspection. Lock material lead times and note long-lead items (panels, breakers, custom cabinets, stone). Plan utility outages and temporary protection. Define acceptance criteria: GFCI/AFCI compliance, tamper-resistant receptacles, slope-to-drain, flood testing, ventilation rates, and manufacturer specifications. Document responsibilities, warranties, and closeout deliverables in your contract.
Assessing Layout, Flow, and Daily Use
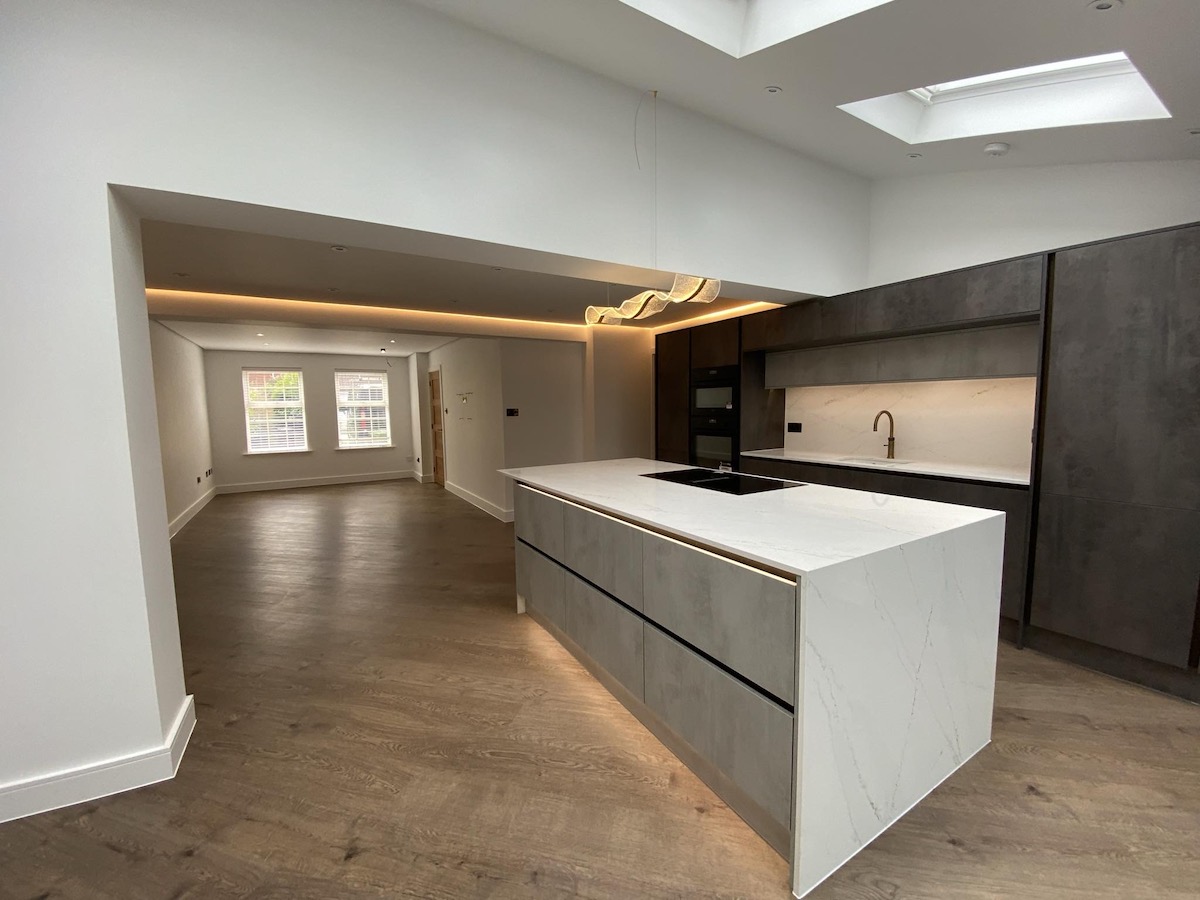
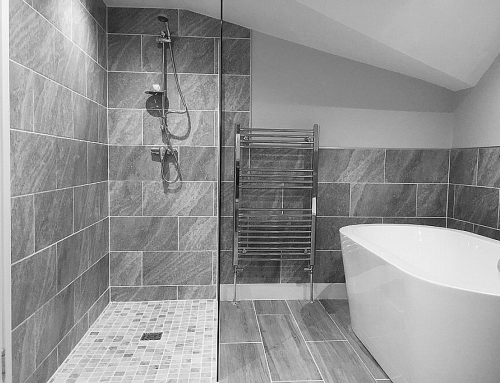
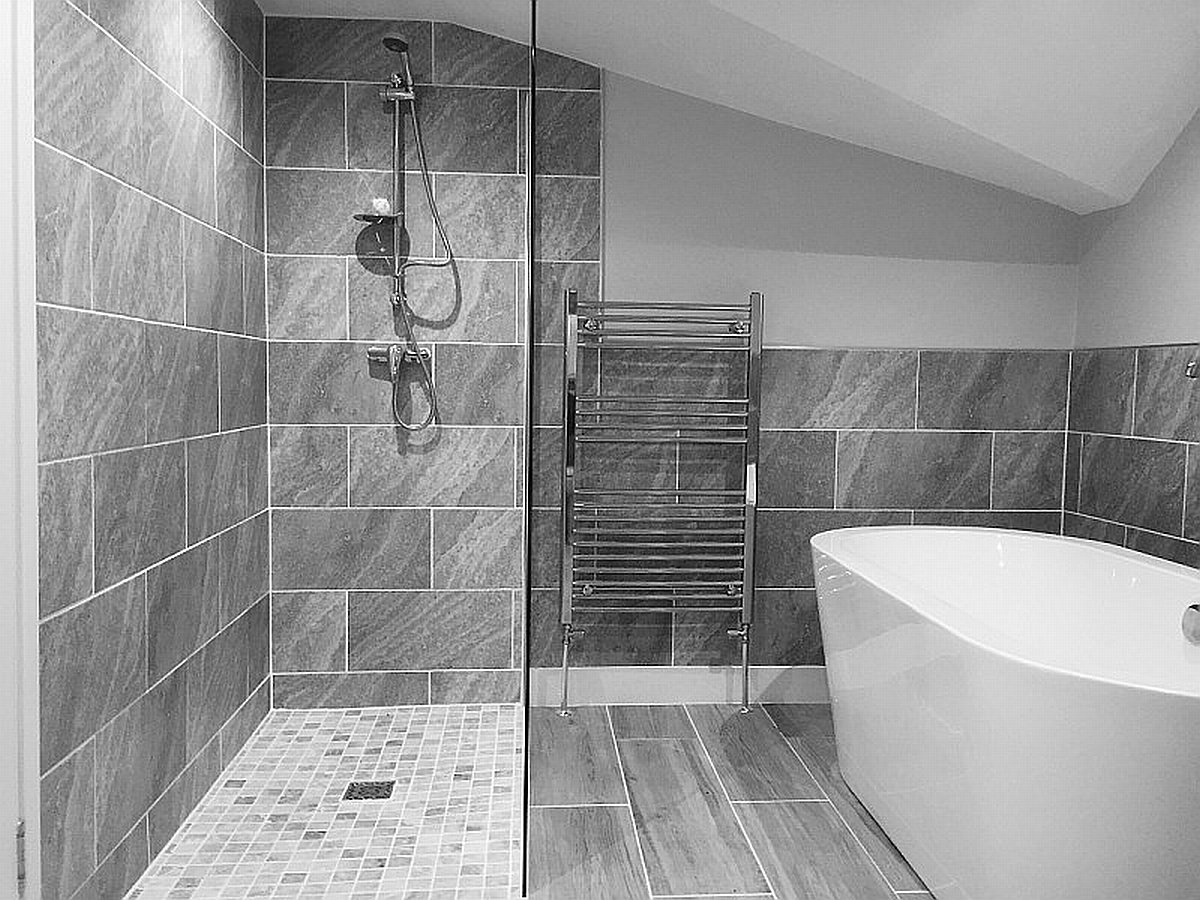
With scope, budget, and inspection points set, pressure-test the plan against how the rooms will perform day to day. Map traffic paths and keep aisles 42–48 inches to prevent pinch points. In kitchens, validate a compact work triangle or efficient work zones; provide 24–36 inches of landing space beside cooktop, sink, and refrigerator. Check door swings, appliance clearances, and hinge sides so doors don’t collide. Place trash, recycling, and cleaning storage on the workflow path, not across it. Set counter heights and pulls for users; mix drawers and roll-outs for access. In bathrooms, allow 30 inches clear in front of fixtures, 21 inches minimum at the toilet, and a 36×36 inch shower footprint for comfort. Position towel bars, niches, and paper holders within easy reach. Layer task and ambient lighting; locate switches at entries with three-way control where paths have doors. Confirm ventilation paths don’t short-circuit airflow.
Structural Limits, Permits, and Code Compliance
You’ll verify load-bearing wall constraints before altering openings by obtaining structural calculations and specifying compliant headers or LVLs per code. Secure required permits early; timelines often run several weeks and fees scale by jurisdiction and project valuation, so budget both. Plan for staged code compliance inspections—rough framing, plumbing, electrical, insulation, and final—and guarantee access, stamped drawings, and time for any corrections.
Load-Bearing Wall Constraints
Although opening up floor plans is appealing, any change to a load-bearing wall requires engineered design, permits, and adherence to the governing code (IRC/IBC). You must verify load paths, tributary areas, and live/dead loads, then size beams or headers accordingly using allowable spans, species, grade, and deflection limits (e.g., L/360 floors, L/240 walls). Provide continuous bearing, adequate end reactions, and approved connectors. Confirm temporary shoring before demolition, maintain shear walls, and preserve required braced wall lines. Relocate utilities without compromising fire blocking or draft-stopping. Maintain egress, fire-resistance ratings, and smoke/CO detector continuity when walls separate dwelling/garage or unit boundaries. Detail footings or posts if reactions exceed existing capacity. Submit sealed calculations, engineered drawings, and special inspections where required. Coordinate framing sequences to limit settlement.
Permitting Timelines and Costs
While timelines and fees vary by jurisdiction, structural scope in kitchens and baths pushes your project into full plan review with engineered drawings, sealed calculations, and special inspection forms, extending permits beyond over-the-counter. Expect 2–8 weeks, depending on seismic/wind design, valuation, and workload. You’ll submit stamped architectural, structural, Title 24/energy, and site utility notes. Valuation sets plan check and permit fees; higher spans, new openings, and shear upgrades increase them. Budget for impactless but real costs: plan check resubmittals, third‑party structural peer review, and special inspection agency setup.
| Scope | Typical Review Window | Typical Fees |
|---|---|---|
| Non-structural kitchen/bath | 0–5 days (OTC if eligible) | $150–$600 |
| Structural: beam/brace or wall removal | 2–8 weeks | 1.5%–3% of valuation + tech fees |
Confirm combined permits to cut fees and clerical time.
Code Compliance Inspections
After permits are issued, inspections verify the built work matches the stamped plans, structural limits, and adopted codes before anything gets covered. You’ll schedule rough inspections for framing, plumbing, electrical, and mechanical, then insulation, then final. Have plans, truss/beam specs, and correction notices on site. Inspectors check spans, bearing, anchor bolts, nail patterns, fire blocking, wet-wall backing, and penetrations sealed to IRC/IBC, IPC, IMC, and NEC. For bathrooms, they’ll confirm shower pan liners are flood-tested, GFCI/AFCI protection, dedicated 20‑amp circuits, ventilation CFM and duct termination. Kitchens require countertop small-appliance circuits, clearances to ranges, anti-tip brackets, and hood makeup air when required. Don’t cover work until approved; get reinspection after corrections. Document approvals for finals and certificate of occupancy or completion. Keep records for warranties.
Plumbing, Electrical, and Ventilation Upgrades
You’ll start by evaluating existing plumbing, electrical circuits, and ventilation paths for condition, sizing, materials, and any defects or obsolete components. Verify code requirements—IPC/UPC, NEC, and IMC/ASHRAE 62.2—including clearances, GFCI/AFCI, bonding, firestopping, CFM targets, duct sizing, and proper terminations. Then plan capacity and loads: fixture units with pressure/pipe sizing, circuit demand with panel capacity, and ventilation CFM with static pressure, ensuring calculated demand matches available supply.
Assess Existing Systems
Before finishes or fixture selections, perform a code‑based audit of plumbing, electrical, and ventilation. Map fixture locations, pipe sizes, shutoff accessibility, and venting paths. Check supply pressure, static and dynamic, and verify hot water recovery and anti‑scald valves. Inspect drain slope, trap conditions, and cleanout access. For electrical, identify circuit loads, breaker ratings, GFCI/AFCI protection, and grounding integrity. Confirm box fill, conductor gauge, and device ratings match expected loads and appliances. Test receptacle spacing, lighting levels, and switching logic against the layout. For ventilation, measure duct size, length, equivalent elbows, and termination points; verify CFM performance and sound ratings. Document deficiencies, photos, and measurements. Prioritize upgrades that mitigate leakage, overloading, or inadequate airflow, and sequence work to minimize rework and downtime. Estimate costs, risks.
Code Compliance Requirements
Building on the audit, bring each upgrade into alignment with the adopted codes (IRC/IPC or UPC, NEC, IMC/ASHRAE 62.2, and local amendments). For plumbing, use approved materials, keep trap seals intact, slope horizontal drains 1/4 in.-per-ft where required, and provide accessible cleanouts. Vent fixtures properly; AAVs are only where your jurisdiction permits. Install scald protection; set water heater delivery at or below 120°F. For electrical, provide GFCI in wet locations and AFCI where required, use tamper-resistant receptacles, follow box fill and conductor protection rules, and bond metal piping. For ventilation, exhaust outdoors with short duct runs and backdraft dampers. Meet minimum airflow limits per ASHRAE 62.2.
- Pull permits and keep approvals.
- Coordinate device/fixture locations for clearances.
- Record concealed work with photos.
Capacity and Load Planning
While code sets the floor, capacity and load planning guarantees the new kitchen and bath don’t suffer nuisance trips, pressure drops, or poor IAQ. Start by doing a full load calc: NEC Article 220 for small-appliance circuits, laundry, and fixed appliances; apply demand factors where allowed. Verify service size, feeder ampacity, AIC, and panel spaces; dedicate AFCI/GFCI per location. Assign separate circuits for microwave, dishwasher, disposer, and warming drawer. For plumbing, calculate peak probable simultaneous flow, size mains and branches per IPC/UPC, check static pressure, and confirm water-heater recovery. For ventilation, meet IMC and ASHRAE 62.2: right-size hood CFM, maintain equivalent length limits, seal ducts, and provide makeup air when thresholds are exceeded. Document labels and spares.
| Checkpoint | Spec |
|---|---|
| Kitchen_circuits | 2x20A-SABCs |
| Range_hood | 150–400CFM+backdraft_damper |
| Bath_fan | 80–110CFM_per_62.2 |
| Water_service | >=3/4in_main;45–80psi |
| Makeup_air | Required_at>=400CFM |
Materials, Finishes, and Waterproofing Standards
Because wet zones demand durability and hygiene, select materials and finishes that comply with adopted codes and listed system requirements. Install cement backer board (ASTM C1325) or glass-mat gypsum (ASTM C1178) in walls; not paper-faced gypsum. Use sheet or liquid membranes meeting ANSI A118.10; detail per TCNA; flood-test receptors 24 hours; slope 1/4 in./ft to drain. Specify tile with wet DCOF ≥0.42 per ANSI A326.3; set with ANSI A118.4 or A118.15 mortars. In splash zones and tops, favor nonporous surfaces or seal stone; choose epoxy grout (ANSI A118.3) and honor EJ171 joints. Use 304/316 stainless or hot-dip galvanized fasteners (ASTM A153). Sealants: ASTM C920. Confirm ICC-ES/IAPMO listings and follow the assembly.
- Detail changes with backer-rod and tooled sealant; avoid grout at changes of plane.
- Provide continuous waterproofing behind or over substrates; don’t rely on coatings labeled water-resistant.
- Coordinate vapor retarder perm rating with wall design to prevent condensation.
Storage, Lighting, and Accessibility Planning
For kitchens and baths, integrate storage, lighting, and accessibility as a single layout exercise that meets code and supports users. Map clearances first: 36 in circulation aisles (42 in for multiple cooks), 30×48 in clear floor space at sinks and appliances, and 60 in turning diameter where needed per ANSI A117.1. Set worktop heights to suit users; include at least one 34 in max-high counter segment with knee/toe clearance. Specify D-shaped pulls, soft-close hardware, and full-extension slides. Provide vertical storage for sheets and trays, pullouts for spices and cleaning, and a hamper or tall cabinet in baths. Keep heavy items between 15–48 in reach ranges.
Design lighting per NEC/energy code: dedicated GFCI circuits near sinks, two or more small-appliance circuits in kitchens, and wet-rated fixtures in shower/tub areas. Layer task (under-cabinet 300–500 lx), ambient (200–300 lx), and accent. Add vacancy sensors, dimming, and night lighting at paths safely.
Hiring the Right Team and Building a Contingency
Before you demo, assemble a licensed, insured team and a realistic contingency tied to scope. Verify your general contractor’s state license, insurance certificates (GL and workers’ comp), and recent code-compliant projects. Get written bids with scopes, allowances, schedules, and permit responsibilities. Require trade-specific licenses for electricians and plumbers, and confirm they’ll pull permits and pass rough/finish inspections. Use a fixed-price contract with change-order procedures, lien waivers, and a progress payment schedule tied to milestones, not calendar dates.
- Demand three references, site visits, and proof of passed inspections
- Precheck lead times for cabinets, tile, and fixtures to lock sequencing
- Clarify waste handling, protection, and daily cleanup to meet code and HOA rules
Build contingency by risk: 10% for straightforward replacements; 15–20% for layout moves, structural, or panel upgrades. Allocate separate allowances for unknowns (hidden damage, asbestos, GFCI/AFCI compliance). Track burn rate weekly and pause work if overruns exceed thresholds.
Frequently Asked Questions
How Do Renovations Affect Home Insurance Coverage During and After Construction?
Renovations can restrict coverage during work and change it afterward. You’ll notify your insurer, add a builder’s risk or renovation endorsement, and raise liability limits. Require contractors to carry GL/workers’ comp, name you as additional insured, and provide certificates. Secure theft-of-materials, water-backup, and ordinance-or-law coverage. Mind vacancy/structural change clauses. After completion, update replacement cost, schedules, and photos, confirm code compliance, and re-rate deductibles and limits to reflect added value accurately.
Are There Eco-Rebates or Tax Credits for Energy-Efficient Fixtures and Appliances?
Yes—like a switch flipping in a dark room—you’ll claim rebates and credits for efficient fixtures/appliances. Check federal 25C credits (up to $1,200/yr; $2,000 for heat pump water heaters), plus state/utility rebates for ENERGY STAR, CEE Tier ratings, and WaterSense. Verify UL/AHRI certifications, permit compliance, and model numbers. Use DSIRE to locate programs, utility marketplaces to apply, and IRS Form 5695 for credits. Keep invoices, photos, and commissioning reports handy, organized.
What Steps Minimize Dust, Noise, and Fumes for Occupants and Neighbors?
Use containment: poly sheeting with zipper doors, taped seams, and a pressure differential using a HEPA negative air machine exhausting outdoors. You’ll install MERV-13 filters, seal supply/return registers, and use dustless tools with HEPA vacs; wet-cut and damp-wipe daily. Specify low/zero-VOC, waterborne, and no-idle equipment; vent fumes outside. Limit hours per noise ordinances, add sound blankets, and notify neighbors. Provide PPE, CO monitors, and make‑up air; dispose/haul out sealed.
How Should We Handle Demolition Waste, Recycling, or Donating Usable Fixtures?
Sort debris at the source: clean wood, metals, concrete/gypsum, cardboard, and MSW. Verify local ordinances, hauler requirements, and diversion targets; obtain any demolition permit and hazardous waste clearances. Test pre-1978 paint (EPA RRP) and survey for asbestos; use licensed abatement if present. Schedule deconstruction to salvage fixtures/appliances for donation (ReStore) or resale; cap utilities first. Use labeled containers, cover loads, document weights/manifests, and get donation receipts for tax records retention.
What Warranty and Maintenance Plans Should We Secure for Installed Products?
When the honeymoon ends, you’ll want coverage that endures: secure manufacturer warranties (parts/labor, finish, corrosion) with written terms, transferability, and minimum 1–5 years; a contractor workmanship warranty (12–24 months); waterproofing/membrane system warranty tied to approved installers; appliance/fixture extended service plans; and leak detection coverage. Register serials, keep receipts, schedule filter changes, anode checks, grout sealing, and annual caulk/GFCI tests per manufacturer, NEC/IPC, to preserve validity. Document photos of installation compliance.

