You’ll turn that garage into a code-compliant retreat by verifying structure, slab, and permits, then mapping utilities and a subpanel. Maximize daylight with low‑E skylights and NFRC doors, flashed, insulated, and Title 24/ENERGY STAR compliant. Zone sleep/live/work, add wall beds and drop‑leaf tables. Upgrade insulation (spray foam, mineral wool), resilient channels, and 5/8-in Type X. Specify durable LVP or tile. Integrate storage, mini‑split, leak sensors, and labeled circuits. Next, you’ll see specs and layouts.
Key Takeaways
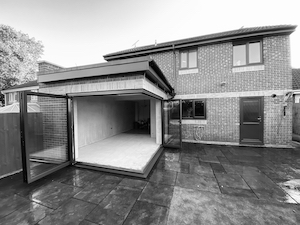
- Flood with natural light via curb-mounted skylights and a glazed insulated garage door using low-E units to meet Title 24 and ENERGY STAR.
- Create flexible zones for sleeping, living, and working with wall beds, drop-leaf tables, and sliding panels while maintaining clear circulation.
- Upgrade envelope for comfort: closed-cell spray foam air sealing, mineral wool soundproofing, 5/8-inch Type X drywall, and solid-core doors with drop seals.
- Integrate sleek storage: flush-inset wall banks, pocket drawers between studs, and touch-latch panels concealing subpanel, HVAC mini-split lines, and smart plumbing safety devices.
- Start with structure, utilities, and permits: assess slab, framing, drainage, and panel capacity; prepare code-compliant plans for smooth approvals.
Evaluating Structure, Codes, and Permits
Blueprints first: verify the garage’s structural capacity, code constraints, and permit path before sketching layouts. Inspect slab thickness, cracks, slope, and vapor barrier; note stem walls, anchor bolts, and termite shields. Confirm framing sizes, spans, bearing points, and shear panels; assess sagging headers over existing openings. Map utilities: panel capacity (amps), circuit availability, gas line proximity, drain elevations, and vent paths. Measure ceiling height for habitable minimums and egress routes. Document setbacks, fire separation at shared walls, and driveway conversion rules.
Next, meet planning and building staff early. Ask about change-of-use classification, insulation R-values, seismic/wind bracing, and other local overlays. Determine parking replacement and impact fees. Obtain engineered calcs if altering openings or adding loads (bathroom, kitchenette, HVAC). Prepare submittals: site plan, demolition plan, dimensioned floor plan, reflected ceiling plan, sections, elevations, structural notes, Title 24/energy forms, and mechanical/ventilation schedules. You’ll reduce redesigns and accelerate inspection sign-offs.
Maximizing Natural Light With Skylights and Glass Doors
Optimize skylight placement by mapping sun path and roof orientation, aligning units between rafters, respecting ridge/valley setbacks, and sizing light wells to code-required framing clearances. Specify glazing with low-E coatings, argon fill, thermally broken frames, and climate-tuned targets (low U-factor, SHGC matched to zone, high VT for daylight). Control privacy and glare with frosted or laminated interlayers, clerestory heights, integrated shades or exterior overhangs, and for glass doors, use obscured glass or adjustable blinds aligned to sightlines.
Skylight Placement Strategies
How do you place skylights and glass doors to harvest daylight without heat or glare penalties? Map sun paths first. North-facing roof planes give even, low-glare light; east adds crisp morning punch; west needs deeper shafts and interior baffles. Center skylights over circulation, not screens or glossy counters. Use paired, smaller units spaced one bay apart to spread luminance. Angle light wells to bounce onto white ceilings, not directly onto seating. Keep skylight-to-floor area roughly 3–5%; increase reflectance to stretch reach. Align glass doors opposite bright walls for soft backlighting; add a modest overhang to cut high-angle rays. Stagger apertures to avoid specular “hot spots.” Maintain joist integrity with headers, keep curbs upslope of valleys, and preserve roof drainage paths. Flash all penetrations carefully.
Energy-Efficient Glazing Choices
Two specs drive daylight without thermal penalties: the glazing package and the frame. Choose NFRC-rated units with low U-factor and climate-tuned SHGC; target U ≤ 0.28 for doors, ≤ 0.30 for skylights in most IECC zones. Low‑E double or triple panes with argon or krypton gas, warm-edge spacers, and laminated outer lites boost efficiency and durability. For skylights, select curb‑mounted, flashed systems with insulated curbs, thermally broken frames, and condensation gutters; pitch per manufacturer to shed water. For glass doors, specify multi‑point locking, continuous weatherstripping, and insulated thresholds. Frame materials matter: fiberglass or uPVC excel; aluminum requires a robust thermal break; clad wood balances stiffness and R‑value. Verify ENERGY STAR or Title 24 compliance, visible transmittance ≥ 0.50, and airtightness ≤ 0.30 cfm/ft² rating.
Privacy and Glare Control
While daylight’s the goal, you’ll need to shape it to protect privacy and kill glare. Specify skylights with diffusing lenses, low-iron glass, and interior baffles to soften beam spread. Offset them north or add light wells with matte white shafts to prevent direct solar penetration. For glazed garage doors, select laminated, acid-etched, or frosted PVB interlayers; aim for VLT 50–70% and SHGC ≤ 0.35. Add exterior shading: deep overhangs, adjustable louvers, or a pergola aligned to your solar azimuth. Inside, layer privacy with top-down/bottom-up shades, dual-roller screens (3–5% openness), and motorized blackout for media. Use anodized tracks, recessed pockets, and casement stops to eliminate light leaks. Tie everything to a sun-tracking control: set glare thresholds (cd/m²), automate tilt, and schedule privacy scenes by zone.
Smart Layouts for Studios, Guest Suites, and Offices
Because space is tight, smart layouts start with deliberate zoning: sleep/live, cook/bathe, and work separated by clear circulation. In a studio, anchor the bed wall opposite the entry, float a sofa to define living, and use a galley kitchenette along the longest wall; you’ll keep a 36-inch aisle and a 60-inch turning circle. Tuck a pocket door bath near plumbing, stack combo washer under-counter, and specify sliding partitions to flex guest privacy. For a guest suite, create a hospitality core: mini kitchenette, closet, and ensuite aligned on one side, with a queen niche and a fold-down desk opposite; route guests directly from entry to seating without crossing the sleep zone. For an office, prioritize daylight on the desk wall, acoustic separation via solid-core doors, and a quick path to a coffee bar and WC. Throughout, leverage millwork: floor-to-ceiling storage, integrated lighting, and concealed cable management, and labeled outlets.
Insulation, Soundproofing, and Year-Round Comfort
To lock in year‑round comfort, you’ll map insulation by assembly: closed-cell spray foam for air sealing, mineral wool or high‑density fiberglass in stud bays, and rigid foam (XPS/PIR) as a continuous thermal break on walls and the garage door. For sound, set STC goals and layer smart: resilient channels, 5/8-inch Type X drywall with damping compound, mineral wool batts, and perimeter seals with acoustical caulk. Build a spec sheet listing R-values, perm ratings, and STC targets so your contractor can price and sequence to code.
Insulation Types Overview
Three core choices anchor a garage conversion’s envelope—fiberglass/mineral wool batts, spray foam (open- and closed-cell), and rigid foam panels—each affecting heat flow, noise, and moisture differently. For studs, batts are budget-friendly and DIYable; use faced batts as your Class II vapor retarder in cold climates, unfaced with a smart membrane in mixed climates. Open-cell foam delivers air sealing; closed-cell adds structure and a Class II vapor retarder at 2 in. Rigid foam (EPS/XPS/PIR) as continuous exterior or interior boards crushes thermal bridges. Target IECC climate-zone R-values (e.g., R-13 to R-21 walls, R-30+ ceilings), tape seams, and seal penetrations. In garages with masonry walls, furr, add continuous foam, then batts in cavities. Don’t forget ignition barriers over foam and decoupled threshold to control slab moisture.
Soundproofing Materials Selection
While your insulation plan tames heat flow, soundproofing hinges on four levers—mass, decoupling, damping, and sealing—applied with code-aware choices. Start by evaluating assemblies: slab, stud walls, door, ceiling. Target STC 55+ at party walls and ceilings; keep fire ratings and ventilation paths intact. Use resilient channels or sound isolation clips, not ad-hoc shims, and backer-rod/caulk every perimeter gap.
- Mass: 5/8″ Type X double drywall with staggered seams; add mass loaded vinyl where thickness is constrained. Verify load on tracks and headers.
- Decoupling: 25 ga RC-1 or clip-and-channel on walls/ceiling; float subfloors over acoustic underlayment. Avoid bridging with outlets or fasteners.
- Damping/sealing: Green Glue between layers; acoustical sealant at plates, boxes, and penetrations. Use solid-core door + drop seal; weatherstrip garage door.
Durable Flooring, Wall Treatments, and Modern Finishes
As you convert a garage into living space, durable finishes anchor performance and polish. Specify flooring that resists moisture wicking from the slab: epoxy or polyaspartic coatings with silica broadcast, sealed LVP with SPC core, or porcelain tile on uncoupling membrane. Add a capillary break (epoxy primer or vapor barrier) and check slab flatness (1/8 in. over 10 ft). If you need insulation, consider a 3/4-in. insulated subfloor panel with integrated vapor retarder.
Walls need abuse-resistance and code-aware layers. Use closed-cell foam or mineral wool in studs, then 5/8-in. Type X drywall for fire separation, or impact-resistant gypsum in high-traffic zones. Add a smart vapor retarder (Class II) if you’re in cold climates. Finish with washable acrylic enamel or microcement for a seamless look.
Modern touches: flush baseboards, reveal trims, LED cove details, matte black or satin hardware, and low-VOC finishes to keep IAQ tight and healthy overall.
Built-In Storage Solutions That Disappear
Carry the clean lines of your finishes into storage by making it vanish into the architecture: flush-inset panels, shadow-reveal frames, and hardware-free touch-latch doors that read as wall. Align reveals at consistent heights, match panel rhythms to window mullions, and run baseboards uninterrupted so cabinetry visually dissolves. Use durable substrates—pre-finished plywood, MDF with catalyzed lacquer, or phenolic-faced birch—then edge-band in the same species as adjacent trim.
Let storage disappear: flush panels, shadow reveals, touch-latch doors, uninterrupted baseboards, durable, edge-banded substrates.
- Full-height wall banks: conceal seasonal bins behind 3/4-inch panels on soft-close pivots; integrate floor sweeps to block dust.
- Overhead soffit lockers: hang to ceiling joists, vent the cavity, and route LED strips in 45-degree aluminum channels for glare-free task light.
- Stair or knee-wall tuck-ins: pocket shallow drawers between studs; add magnetic catches, recessed pulls, and felt-lined trays for tools and cords.
Specify leveling feet, scribe fillers, and 1/8-inch gaps; paint-grade caulk seams for seamless, serviceable longevity and access.
Multifunctional Furniture and Flexible Zones
Because a garage has to flex by the hour, you’ll spec pieces that reconfigure without visual noise and define zones by function, power, and clearance. Anchor the plan with a wall bed that flips into a sofa, a drop-leaf table that spans dining to drafting, and a caster‑locking island that parks as needed. Use nesting side tables, stackable stools, and lightweight lounge chairs to scale up or down fast. Demarcate zones with rugs, ceiling lines, and sliding panels; maintain 36-inch passages and a clear 60-inch turn at key nodes. Keep door swings and egress paths unobstructed, and verify loads before hanging anything from studs or overhead tracks. Choose low-profile storage benches to buffer acoustics and hide linens. Specify durable, cleanable finishes—compact laminate, powder-coated steel, performance textiles. Add floor grommets and cable chases only where furniture truly lands. Label everything; color-code casters and handles so reconfiguration is intuitive daily.
Electrical, Plumbing, and Smart Tech Upgrades
While the room flexes, the infrastructure should be overbuilt and code‑tight: plan a subpanel, dedicated 240V for EV/mini‑split, and separate 20A circuits for workbench, kitchenette, and AV, all with required GFCI/AFCI per NEC. Run EMT or NM‑B per jurisdiction, label circuits, keep home runs tidy with service loops. Choose tamper‑resistant receptacles, dimmable LED cans, low‑voltage prewire for data, PoE cameras, and access control.
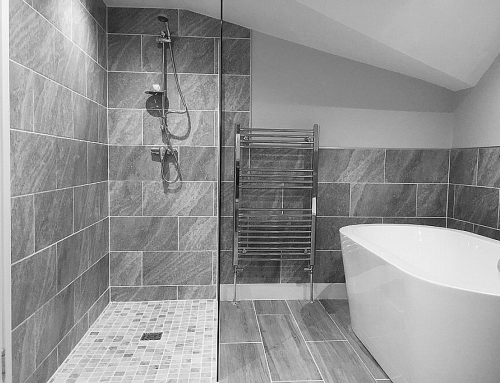
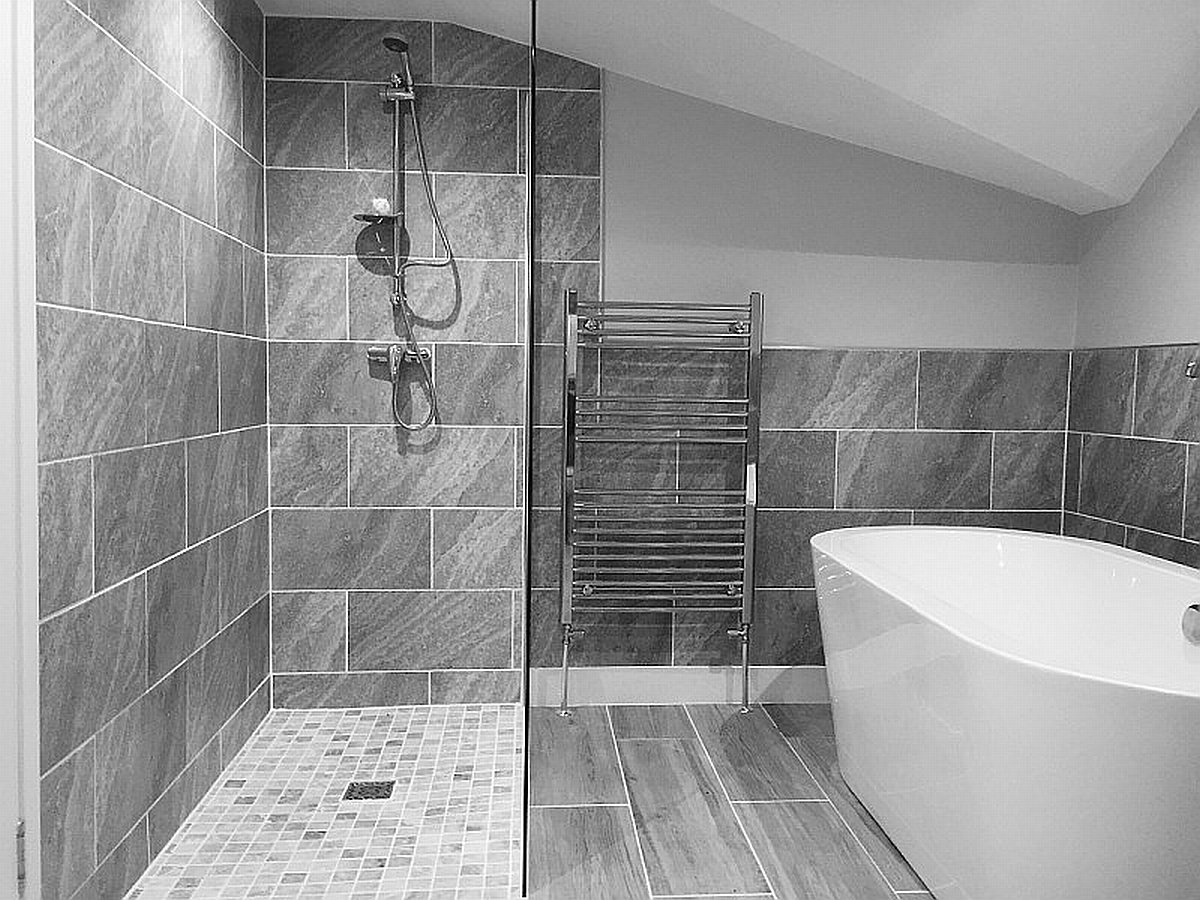
- Plumbing: Add a 2-inch drain for a curbless shower, a vented lav, and a wet‑bar sink on a single trap arm if distances allow. Insulate PEX, slope runs, and include a cleanout. Set a smart leak valve and floor sensor.
- HVAC/controls: Rough for a mini‑split with condensate pump, dedicated disconnect, and wifi thermostat. Add transfer grilles, door sweeps, and motorized shades for load shedding.
- Smart stack: Centralize Cat6, coax, and speaker wire; spec PoE switches, a UPS, and a wall‑mounted rack. Use scenes, not gadgets.
Budgeting, Sustainability, and Project Timeline
Though scope creeps fast in a garage conversion, anchor the plan to a clear budget, sustainability targets, and a realistic schedule. Map fixed costs (permits, insulation, egress) before style picks. Use a top-down budget, then lock allowances per trade: framing, MEPs, envelope, finishes, contingencies. Track with a spreadsheet and burn rate. Prioritize envelope first; it reduces HVAC size and runtime. Choose durable, repairable materials to cut future waste. Specify smart controls only where they deliver savings. Sequence tightly: permitting, demo, rough-ins, inspections, air-seal/insulate, drywall, prime, trim, paint, floors, punch. Build float for lead times and re-inspections. Time-box decisions: 48 hours on selections, 7 days on change orders. If scope shifts, pause, re-baseline cost and schedule, then proceed.
| Focus | Spec |
|---|---|
| Budget | Set cap: $40–80/sf; add 12% contingency |
| Energy | R-19+ walls, R-30+ lid; 0.30 U-factor windows |
| Materials | FSC/low-VOC, recycled drywall, LED 2700–3000K |
| Timeline | Demo 1–2 wks; rough-in 2–3; finishes 3–4 |
Frequently Asked Questions
How Does a Garage Conversion Affect Homeowners Insurance and Liability Coverage?
It changes risk and coverage. You must notify your insurer; the space becomes finished living area, raising dwelling limits, premiums, and rebuild cost. Add ordinance-or-law coverage for code upgrades. If you rent it, you’ll need landlord or unit endorsement, plus higher liability or an umbrella. Verify permits, egress, wiring, and HVAC; noncompliance can void claims. Update personal property classes, loss-of-use, and valuations. Get a new appraisal and keep before/after photos.
What Are Smart Parking Alternatives Once the Garage Becomes Living Space?
Street vs. structure, sensors vs. signage: you’ll pivot to smart curbside and driveway solutions. Secure a residential permit, add a fold-down bollard, and stripe a permeable-paver pad within setback limits. Consider a slim carport or a two-post stacker (check load, easements, snow). Install an EV pedestal with GFCI and conduit in conduit path. Use ANPR cameras and a reservation app for guest parking. Or ditch ownership: car-share, e-bikes, cargo scooters.
Which Pet-Friendly Materials Resist Scratches, Odors, and Easy Cleanup?
Porcelain tile (PEI 4–5) with epoxy grout, LVP/LVT with 20–28 mil wear layer, and sealed concrete (polyaspartic topcoat) resist scratches, odors, and clean fast. Choose solution-dyed polypropylene rugs, microfiber/ultrasuede or Crypton upholstery (Martindale >100k), and top-coated leather sparingly. You’ll use PVC baseboards, FRP wall panels, and scuff-resistant satin enamel paint. Specify low-VOC, pet-safe sealers; radius corners; matte finishes; and removable covers/tray zones to contain messes and simplify maintenance for cleaning.
How to Navigate HOA Rules and Neighbor Concerns About Garage Conversions?
Start by reading your CC&Rs and design guidelines, then you’ll request an HOA pre-review. Prepare your submittal: stamped plans, elevations, materials palette, parking plan, and compliance matrix (setbacks, fire, egress). Verify local ADU/garage-conversion statutes that preempt HOAs. For neighbors, don’t surprise—do door-to-door outreach with renderings, hours, and a noise/dust plan. Mitigate with sound-rated assemblies, obscured glazing, light-shielding, and on-site parking. Record approvals, conditions, and inspection milestones in a log carefully.
Tips for Creating Seamless Indoor-Outdoor Flow With Patios and Courtyards?
Measure twice, cut once. You’ll blur boundaries by aligning floor levels and continuing materials—porcelain pavers matching interior tile, flush thresholds, concealed tracks. Use sliding or pivot doors with low U-values, insect screens, and overhangs for shade. Zone lighting on dimmers, duplicate power/data outdoors, and specify weather-rated fixtures. Add planters as walls, drainage gradients of 1–2%, and a fire or water feature. Program privacy with lattice, clerestory glazing, and smart blinds.
