Choosing between a wet room and a traditional bathroom comes down to waterproofing, drainage, and how you use the space. A wet room offers a seamless, accessible shower with drainage and full membrane protection, ideal for aging-in-place and small layouts. A traditional install emphasizes durable finishes, fixed fixtures, and clear zoning with subfloor support. Consider cost, maintenance, and ventilation to prevent mold. Whichever you pick, you’ll gain safety, value, and easy upkeep—and more insights await.
Key Takeaways
- Wet rooms provide full waterproofing, level shower areas, and seamless layouts, maximizing space and accessibility.
- Traditional bathroom installations emphasize durability and proven layouts with careful drainage and waterproofing.
- For aging-in-place, ensure step-free access, sturdy grab rails, seating, wide entry, and adjustable controls.
- Design flexibility and materials should use modular components, frameless glass, wall-mounted vanities, and easy-clean finishes.
- Plan budget, timelines, and trades carefully, including permits, warranties, and maintenance records for long-term value.
What Is a Wet Room and How Does It Work?
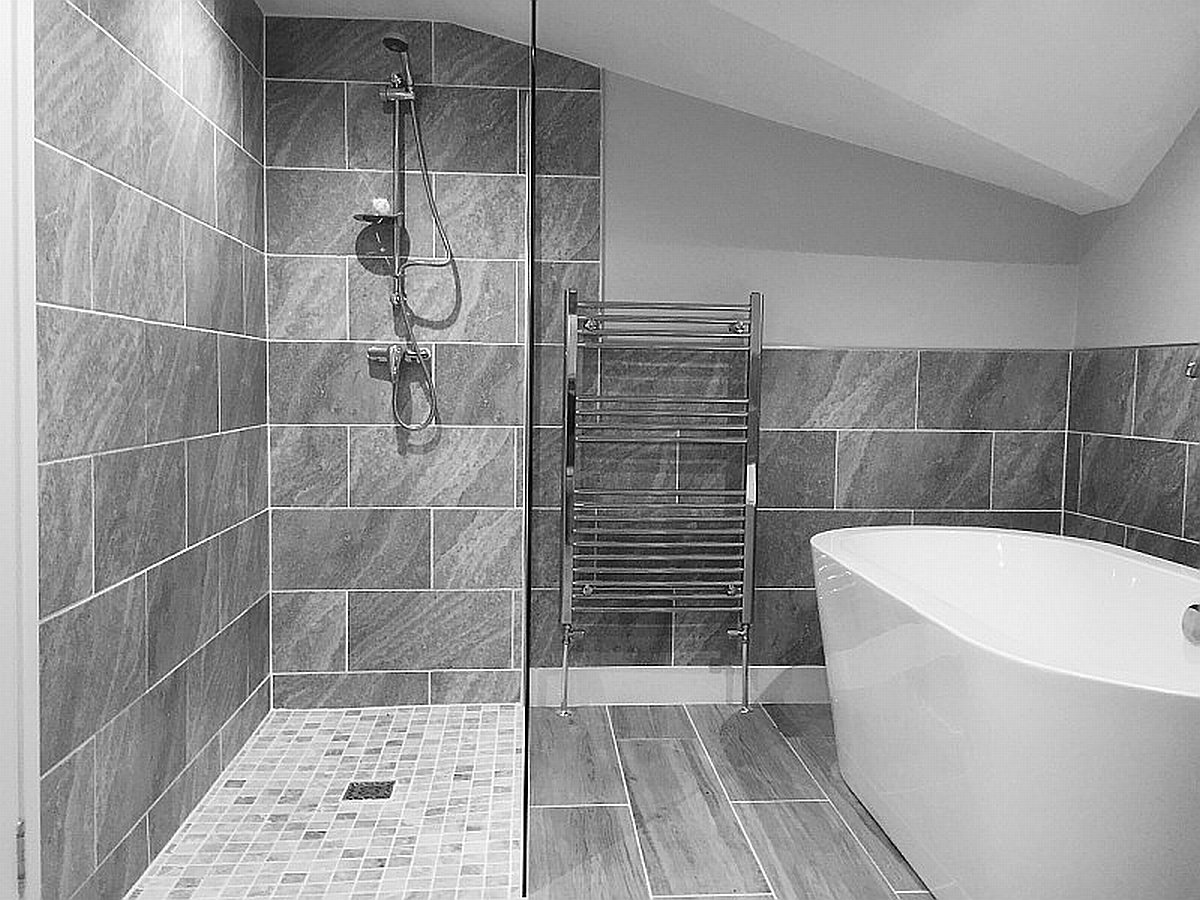
While a wet room looks simple, it’s fundamentally a fully waterproofed bathroom where the shower area is level with the rest of the floor so water drains away through a single floor drain or linear channel; you’ll get a seamless, open-plan shower with no tray or raised curb. You’ll use a continuous membrane across floor and walls, and build falls into the subfloor so water reaches the drain quickly. Pick slip-resistant tiles, tight grout lines and sealants rated for wet environments. Plan drain capacity, location and access for cleaning. Guarantee adequate ventilation, moisture-resistant fittings and durable fixtures to limit mould and deterioration. For retrofits, a linear drain or shallow screed can resolve level issues without bulky trays. Include a pre-tile water test to confirm waterproofing. By focusing on proper detailing, workmanship and serviceable choices, you’ll end up with a truly accessible, low-maintenance bathroom that performs reliably long term.
Key Components of a Traditional Bathroom Installation
When you’re planning a traditional bathroom installation, focus first on a coordinated set of components that determine durability, safety and ease of use: a structurally sound and level subfloor with appropriate falls to the waste; reliable hot and cold supply and soil/waste connections with accessible traps and isolation valves; a correctly sized shower/bath tray and waste with watertight seals; wall and floor substrates prepared for tile or panel finishes plus localized waterproofing around wet zones; compliant electrical work (RCD protection, lighting and extractor fan in the right zones); heating and ventilation sized to control moisture; and quality fixtures, valves and fittings chosen for serviceability and lifespan. Next, check layout, access and storage so fixtures sit ergonomically and maintenance is straightforward. Choose durable finishes and guarantee trades coordinate sequencing — plumbing, electrical, tiling and heating — to avoid rework. Specify serviceable valves, accessible inspection points and removable panels for future repairs. Confirm ventilation rates and towel heating capacity to manage moisture. Finally, get written schedules and warranties, and use qualified installers to meet standards and insurance requirements.
| Component | Purpose | Maintenance |
|---|---|---|
| Subfloor | Stability & drainage | Inspect yearly |
| Plumbing | Supply/waste reliability | Test valves, check traps |
Waterproofing and Drainage: Comparing Methods
When you choose waterproofing, weigh membrane types and their pros for your space. You’ll want the slope and drain placement right to prevent standing water and guide water efficiently. We’ll compare drain systems so you can pick the option that fits your shower size and maintenance preferences.
Membrane Types and Pros
There are several membrane options to evaluate for bathrooms and wet rooms, each with strengths depending on substrate, movement, and budget. You’ll pick according to substrate compatibility, anticipated movement, and service life. In practice, your choice comes down to performance, install ease, and long-term maintenance considerations. The table below summarizes practical options you can discuss with your installer, to match your space and expectations.
| Membrane Type | Key Benefit | Considerations |
|---|---|---|
| Liquid-applied | Seamless, waterproof | Requires skilled install |
| Sheet membranes | Durable, quick install | Fit issues on complex corners |
| Cementitious backer with integral membrane | Good adhesion to substrates | Heavier, longer cure |
Ask for test sections, warranty coverage, and compatible finishes to guarantee you get a durable, leak-free bathroom. Your budget and timeline guide the final pick today.
Slope and Drain Placement
Getting the slope right and placing the drain correctly matters a lot because it directly affects waterproofing performance and long-term durability. You need a subtle fall toward the drain—enough to move water efficiently without pooling in corners. In wet rooms, use a continuous membrane and guarantee the screed has a consistent gradient of about 1 to 2 percent toward the drain. Position the drain flat and level with the surrounding screed, and seal the clamping ring well to prevent leaks. Check that shifts between wall and floor are watertight, with properly embedded tiles and accurate mortar bed thickness. Test the shower area with a brief water run before tiling completion, so you can catch drainage issues early. Precise slope and drain placement save time.
Drain Systems Compared
Different drain systems offer different balances of waterproofing reliability, ease of installation, and long-term maintenance, so you can choose based on your shower’s layout and budget. For waterproofing, your choice hinges on substrate, coving, and the pan design you’re comfortable with. You’ll weigh membrane options, flange details, and maintenance needs against potential future layout changes.
- Traditional pan with a liner
- Fully bonded membrane shower wall-to-wall
- Floor-level drain with a waterproofing sleeve
- Linear drain with a tiled cover
Whichever path you choose, confirm compatibility with your waterproofing plan, drain position, and maintenance routine so your shower stays leak-free and easy to clean for years. Coordinate with your installer on flashings, slope accuracy, and access to trap cleanouts to avoid costly remediation. Keep records for maintenance.
Accessibility and Ageing-in-Place Considerations
To support ageing-in-place, you should prioritise step-free shower access so you can enter and exit safely without a lip. Install sturdy grab rails and a stable shower seat positioned for easy reach from both standing and seated positions. This approach keeps the layout and fixtures flexible for future adjustments as mobility changes.
Step-free Shower Access
If you’re planning a bathroom that’s easy to use now and in the future, step-free shower access can be a practical cornerstone. To achieve it, plan a flush threshold, a wide entry, and a non-slip floor. Choose a shower area with a fixed head and handheld option, so every user can reach controls safely, and guarantee a seated alternative if needed.
1) Flush threshold and wide entry for wheelchair and walker access
2) Non-slip flooring and sealed joints to prevent slips
3) Adjustable, easy-to-reach controls and a handheld spray
4) Minimalistic, accessible seating or a shower perch when appropriate
If you keep these elements in mind, your shower remains comfortable for today and adaptable for future needs, reducing the risk of trips, awkward transfers, and costly remodels later.
Grab Rails & Seating
Building on step-free access, grab rails and seating add stability and autonomy for daily routines you’ll rely on now and in the future. When planning, position rails beside the toilet and in the shower at a height that feels natural to you, and choose routes that keep soap and water away from slippery floors. Look for rails with textured grips, corrosion resistance, and load ratings suited to your needs. Seated options should be comfortable, with a stable base and easy-to-clean surfaces. Consider a shower seat or fold-down option that tucks away when not in use. Install a quick-release handheld shower wand for versatility. Finally, review how your needs may change, and leave enough space for movements and transfers in urgent moments for safer use.
Design Flexibility and Aesthetic Options
Although space is often tight, you can still achieve a spa-like look with flexible layouts, scalable fixtures, and a cohesive color palette. Design flexibility lets you mix materials, adjust lighting, and choose modular components that grow with your needs. Stick to simple lines, concealed storage, and a dry zone that reflects your daily rituals. Your choices should support function first, then style, so maintenance stays straightforward. This balance helps you update aesthetics without a full redesign.
Modular, low-maintenance spa design with flexible layouts and concealed storage.
Choose a timeless palette inspired by nature, layer textures, and keep fittings easy to clean. Consider frameless glass, wall-mounted vanities, and recessed niches to reduce clutter, while allowing personality through accessory finishes.
1) Optimize for modular components that adapt as needs change.
2) Select low-maintenance materials with water resistance and longevity.
3) Use lighting scenes and dimmers to shift mood easily.
4) Choose hardware finishes that coordinate with fixtures and taps.
It stays practical and timeless.
Space Requirements and Layout Planning
Set out a clear footprint by mapping fixed services and the flow between dry and wet zones before picking fittings. Start with door swing, fixed plumbing, vent positions, and electrical outlets to avoid clashes later. You’ll want a workable circle of movement, not a squeeze, so account for door clearance, towel rail reach, and elbow room around the basin.
Then translate that footprint into a grid you can reference when placing the toilet, basin, shower, and bath. Keep wet zones away from power sources where possible and choose warm, non-slip finishes. Allow enough space for movement and future comfort, such as grab rails or a taller vanity. Plan storage that doesn’t interrupt the flow, and design for easy cleaning with minimal joints and gradients. Double-check that the layout supports ventilation and lighting, so you’ll won’t fight humidity later. This planning pays off in comfort, efficiency, and fewer surprises.
Installation Cost, Timeline, and Trades Involved
Two weeks of install time is typical for a full bathroom, depending on the scope. You should budget for design meetings, permits where needed, and product lead times, which can shift schedules. Shortfalls in tiles, fixtures, or waterproofing materials rarely speed things up—plan for contingencies. Labor costs reflect trades such as plumbing, electrical, tiling, plastering, and carpentry. You’ll get a clear timeline from your contractor, with milestones and check-ins to keep you in the loop. Here’s what to expect regarding cost, timing, and who does what.
- Cost factors include materials, trade rates, delivery delays, and scope changes.
- Milestone timing covers demolition, rough-in, waterproofing, tiling, fixtures, and finishes.
- Trades involved span plumber, electrician, tiler, carpenter, and moisture barrier specialists.
- Contingencies and communication reduce surprises through clear change orders and site access.
Ask for a written plan with prices, dates, and who covers each task. Reconfirm before signing.
Maintenance, Cleaning, and Long-Term Upkeep
You’ll set up a practical cleaning routine for tiles, grout, and fittings to keep your bathroom looking fresh and performing well. By addressing ventilation, moisture control, and regular inspections, you’ll reduce mold and mildew and protect surfaces. You’ll also plan for long-term upkeep costs so you’re prepared for repairs, replacements, and occasional upgrades.
Routine Cleaning Tips
Regular cleaning is essential for prolonging the life of your bathroom, and it doesn’t have to be complicated.
To keep everything performing, follow these routine steps you can apply consistently:
- Wipe high-touch surfaces daily with a mild cleaner to prevent buildup.
- Vacuum or dry-mop floors weekly, then spot-clean spills immediately.
- Scrub sinks, taps, and countertops with non-abrasive cleaner twice a week.
- Inspect grout and seals monthly and reseal as needed.
Keep the routine simple by batching tasks and using the same products across surfaces. Avoid harsh chemicals near sealants, and dry surfaces after showers to minimize water spots and wear.
Record what you use and when you reapply seals, so upkeep stays predictable and you never miss a routine. This keeps your bathroom reliable.
Preventing Mold and Mildew
Mold and mildew don’t have to be a fact of life in damp spaces when you maintain ventilation, quick-dry habits, and a steady cleaning routine. Start by sealing gaps, drying surfaces after showers, and using a squeegee on mirrors. Choose a mold-safe cleaner, apply it to grout weekly, and tackle any stains promptly. Ventilate during and after baths, run the exhaust fan for at least 20 minutes, and keep humidity below 60 percent. If you notice recurring damp, address leaks fast and consider a dehumidifier for high-moisture rooms. Keep towels dry, rotate bath mats, and store products in shelves away from direct water spray. Record quick checks after rains and refurbishments, so you catch mold risks before they spread. Consistency saves trips to cleaners.
Long-Term Maintenance Costs
Three ongoing costs shape long-term maintenance: routine cleaning and sealing to prevent deterioration, periodic refreshes of grout, seals, and waterproof membranes, and occasional repairs or replacements for fixtures, vents, and plumbing. You’ll schedule regular wipe-downs and resealing, budget for grout refresh every 1–2 years, and track wear on seals and membranes. Keep an eye on vent efficiency, check for leaks, and plan upgrades when components reach end of life.
1) Schedule annual inspections
2) Re-seal and regrout as needed
3) Replace aging membranes and seals on schedule
4) Track warranties and labor costs
Impact on Property Value and Resale Potential
If you’re planning bathroom installations or a wet room, the impact on your property’s value and resale potential is worth weighing early. A well-executed upgrade can attract buyers who value modern, low-maintenance spaces and perceived quality. Choose durable fixtures, proper ventilation, and watertight construction to minimize future issues that could lower value. Consider the age, current layout, and regional market expectations; a discreet, high-quality finish often yields better return than trendy but fragile designs. In wet rooms, guarantee slip-resistant flooring, reliable drainage, and adequate waterproofing to avoid costly remediation later. Energy-efficient fixtures, such as low-flow taps and LED lighting, appeal to eco-conscious buyers and may improve appraisal outcomes. Documentation matters: keep warranties, permits, and maintenance records to demonstrate diligence. Finally, balance cost against likely resale lift; over-improving beyond market norms can erode potential gains. Your goal is certainty, not unattainable prestige. Plan thoughtfully, involve pros, and confirm goals.
How to Choose the Best Option for Your Home and Lifestyle
Want to pick the best option for your home and lifestyle? When choosing bathroom installations or a wet room, assess water use, maintenance, and daily routines. Consider your space, light, and ventilation, because these shape long-term comfort and costs. Align materials with your climate and family needs, balancing durability with aesthetics. Think about resale value, accessibility, and future flexibility so your choice stays relevant as life changes.
- Evaluate space efficiency and layout flow.
- Prioritize low-maintenance finishes and reliable seals.
- Plan for ventilation, moisture control, and mold prevention.
- Choose fixtures that fit your budget while meeting accessibility needs.
Clarify installation timelines, warranties, and the impact on your existing plumbing. Ask for samples or swatches to verify fit with your bathroom’s humidity and lighting. Reduces surprises and keeps you within budget overall.
Frequently Asked Questions
What Building Permits Are Needed for Bathroom Renovations in My Area?
Permits vary by location, but typically you’ll need a building permit for structural changes, plumbing, or electrical work in a bathroom renovation. Check with your building department to confirm requirements, whether a plan review is needed. You may also need an electrical permit and, if you’re moving fixtures, a plumbing permit. Expect inspections at rough-in and final, and a pre-inspection if required. Your contractor can guide you through filing process.
Do Waterproofing Products Affect Indoor Air Quality and Safety?
Imagine this: waterproofing products can affect indoor air quality and safety. Yes, some emit VOCs and fumes during application and curing, so you’ll want good ventilation and minimal occupancy until cured. Choose low-VOC, water-based formulations when possible, and follow the manufacturer’s cure times and mixing instructions. Wear appropriate PPE, avoid skin contact, and keep pets away. Seal storage areas, dispose of containers properly, and guarantee the area is dried before finishing.
How Long Can I Stay Without a Bathroom During Renovation?
How long you can stay without a bathroom during renovation depends on your setup and plumbing access, but plan for at least a few days and up to a couple of weeks for full remodels. Create a clear alternative—portable toilet, nearby facility, or a bathroom trailer—plus a secondary sink outside if possible. Schedule demolition and plumbing work around high-use times, and streamline detours to minimize disruption and odors for comfort.
Will a Heated Floor Be Worth the Extra Upfront Cost?
Yes, a heated floor can be worth it if you value comfort and long term savings. You’ll pay more upfront for mats or cables and added installation time, but you’ll enjoy steady warmth underfoot and potentially lower heating bills. Consider zone controls, floor-surface compatibility, and tile thickness. Budget for insulation, thermostat, and professional wiring. If you regularly use the bathroom in cold mornings, it’s a practical upgrade you’ll notice daily.
Which Trades Licenses Are Required for Electrical, Plumbing, and Insulation?
A stitch in time saves nine. For electrical work, you’ll need a licensed electrician; for plumbing, a licensed plumber; and for insulation, a licensed contractor or qualified installer depending on your area. Always verify licenses, insurance, and permits before starting, and arrange staged inspections to avoid unwanted hold-ups. If in doubt, ask the trades to show their credentials and a written scope of work so you stay compliant and protected.